
On-device AI/ML in React Native
 Przemyslaw Weglik•Jun 24, 2024•9 min read
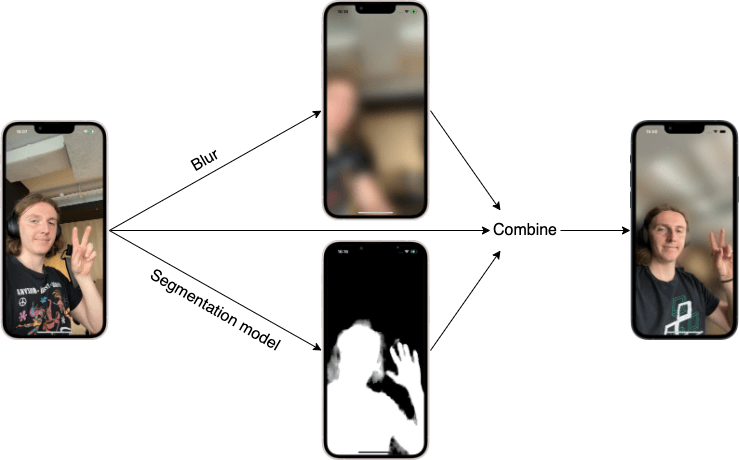
Mobile phones are powerful enough to run real-time inference on the device. It can be used to classify images, detect spoken language or as in this tutorial blur the background behind the person. We’ll show you how to set up a React Native app and run a computer vision model in real-time using react-native-vision-camera and react-native-fast-tflite. The high-level idea is shown in the diagram below:
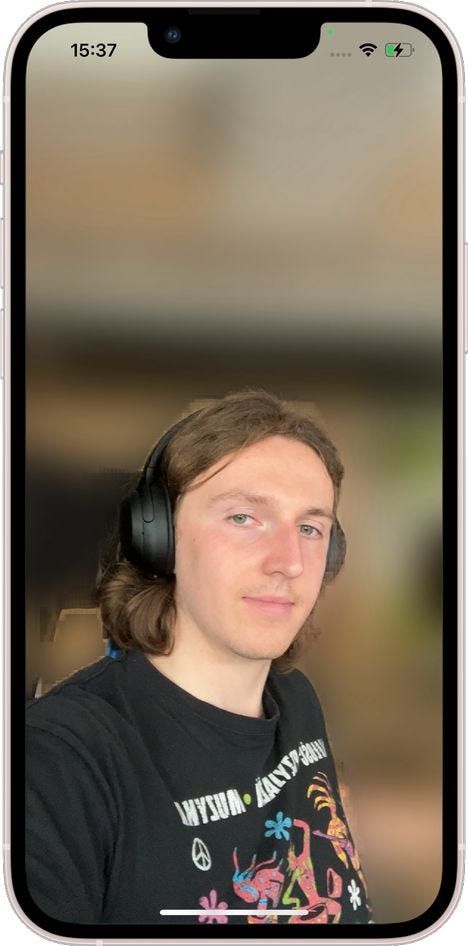
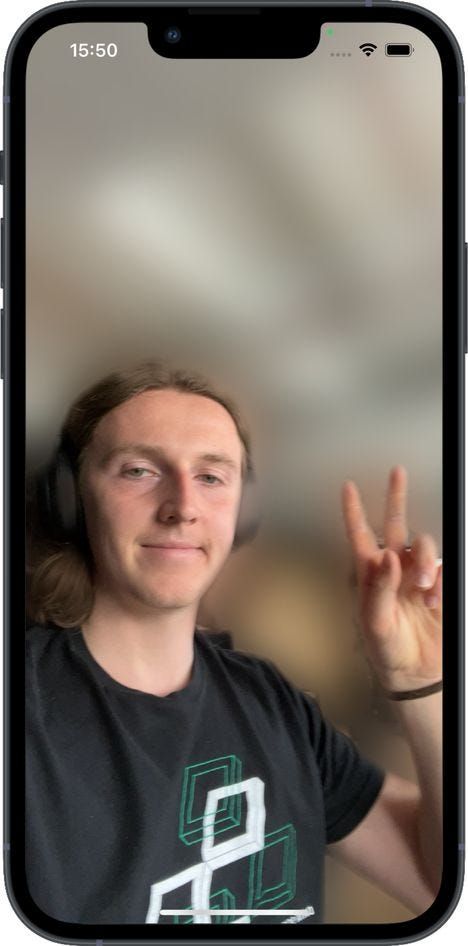
By the end, we should accomplish this:

Preparing model
For this tutorial specifically, we already prepared a model (get it from here), but you can choose any model you like and modify the code below accordingly. You can find more .tflite models at https://www.kaggle.com/models. Make sure you filter by Framework and choose TensorFlow Lite.
Setting up a React Native app
Disclaimer: this tutorial currently works only on iPhone/iOS, due to minor bugs with React Native Vision Camera version 4
We start by creating a new project (choose Blank (Typescript)) and installing dependencies:
npx create-expo-app rn-ai-tutorial --template
cd rn-ai-tutorial
npm install react-native-vision-camera react-native-fast-tflite vision-camera-resize-plugin @shopify/react-native-skia react-native-worklets-core react-native-reanimated
Edit babel.config.js :
module.exports = function (api) {
  api.cache(true);
  return {
    presets: ["babel-preset-expo"],
    plugins: [
      "react-native-worklets-core/plugin",
      "react-native-reanimated/plugin",
    ],
  };
};
Generate native iOS code:
npx expo prebuild --platform iosWe can try to make the first test run of the app to check if everything was set up correctly. Remember to plug in your iOS device first and to configure the signing team in Xcode and add the same account as the app developer on the iOS device. Finally, we can run the app (it may take some time):
npx expo run:ios -dYou should get something like this:
The last thing we need to prepare is the camera. Add the following lines to Info.plist :
<key>NSCameraUsageDescription</key>
<string>$(PRODUCT_NAME) needs access to your Camera.</string>
Finally, we can create a Camera component from react-native-vision-cameralibrary. We also need to make sure we have permission to use it.
// src/MainScreen.tsx
import React, { useEffect, useState } from 'react';
import { Text, View, StyleSheet } from 'react-native';
import { Camera, useCameraDevice } from 'react-native-vision-camera';

function MainScreen({ hasPermission }: { hasPermission: boolean }) {
  const device = useCameraDevice('front');

  return (
    <View style={StyleSheet.absoluteFill}>
      <View style={{ flex: 1 }}>
        <Camera style={StyleSheet.absoluteFill} device={device} isActive />
      </View>
    </View>
  );
}

export default function MainScreenAskingForPermission() {
  const [hasPermission, setHasPermission] = useState(false);
  useEffect(() => {
    Camera.requestCameraPermission().then((p) =>
      setHasPermission(p === 'granted')
    );
  }, []);

  return <MainScreen hasPermission={hasPermission} />;
}
// App.tsx
import { View } from 'react-native';
import MainScreen from './src/MainScreen';
export default function App() {
return (
<View style={{ flex: 1 }}>
<MainScreen />
</View>
);
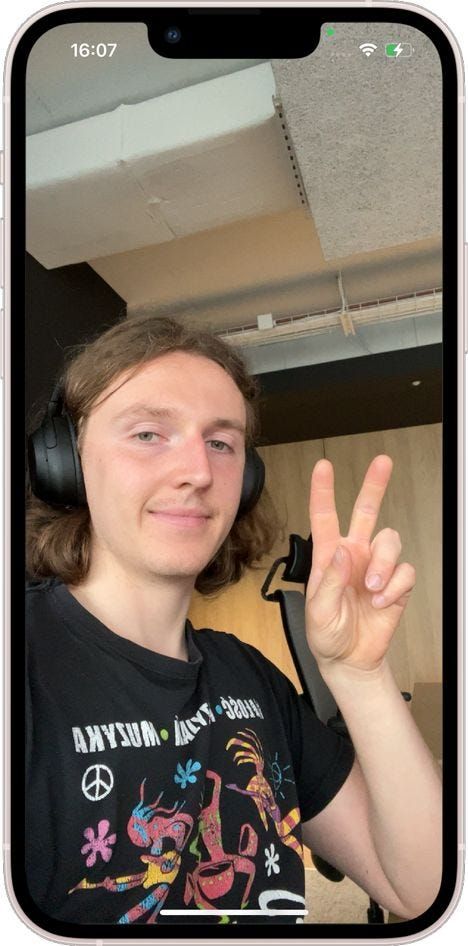
}You should see the camera output now:
Adding SkiaFrameProcessor and running our model
We’re going to create a frame processor that will receive a single frame coming from the camera, detect a human silhouette and blur the background.
Let’s start by creating bare-bone SkiaFrameProcessor. The only thing it does it draw the frame.
// src/MainScreen.tsx
// ...
const frameProcessor = useSkiaFrameProcessor((frame) => {
  'worklet';

  frame.render();
}, []);

// ...

<Camera
  style={StyleSheet.absoluteFill}
  device={device}
  isActive
  frameProcessor={frameProcessor}
/>
Next step is loading our model and running it. We will utilize two libraries: react-native-fast-tfliteand vision-camera-resize-plugin. The first one is used to actually load our .tflite model. The other one is used to resize the camera frame into a format and size accepted by the model. Those libraries are meant to be used together and compatible.
Before writing any code, we need to add our model file to the application’s assets and make sure it’s included in the bundle. Add selfie_segmenter.tflite (get it from here) to assets directory. Then create metro.config.js file and add the following lines:
// metro.config.js
const { getDefaultConfig } = require('expo/metro-config');
const config = getDefaultConfig(__dirname);
config.resolver.assetExts.push('tflite');
module.exports = config;
Note: the step above will require reset of metro server. Hot reload can’t handle adding new assets and changes to bundler settings.
Now we can modify our frame processor. For convenience, we will move it to a separate file:
// src/SelfieSegmentationFrameProcessor.ts

import { useTensorflowModel } from 'react-native-fast-tflite';
import { Frame, useSkiaFrameProcessor } from 'react-native-vision-camera';
import { useResizePlugin } from 'vision-camera-resize-plugin';

export const useFrameSelfieSegmentation = () => {
  const tf = useTensorflowModel(require('../assets/selfie_segmenter.tflite'));
  const { resize } = useResizePlugin();

  const segment = (frame: Frame) => {
    'worklet';
    if (tf.state !== 'loaded' || tf.model === undefined) {
      return null;
    }

    const resizedFrame = resize(frame, {
      scale: { width: 256, height: 256 },
      crop: { x: 0, y: 0, width: frame.width, height: frame.height },
      pixelFormat: 'rgb',
      dataType: 'float32',
    });
    const output: any[] = tf.model.runSync([resizedFrame]);

    return output[0];
  };

  const frameProcessor = useSkiaFrameProcessor((frame) => {
    'worklet';

    const mask = segment(frame);

    if (mask !== null) {
      console.log(mask.length);
    }

    frame.render();
  }, []);

  return { frameProcessor };
};
// src/MainScreen.tsx
// ...
const { frameProcessor } = useFrameSelfieSegmentation();
// ...Let’s walk through this code. We’re creating a custom React hook that will return our frame processor, which we can later pass to Camera. At the begging of the hook, we create the TFLite plugin and resize function.
Next, in the function segment we convert the frame into the correct format for the model. We can define new size, crop of the original image, output pixel layout and data type. Most of these depend on what model you use and what input it expects. After conversion, we run inference with TFLite model and return output. You may notice we return output[0], because by default this model processes a batch of input images.
Finally, we can call segment function in processor. For testing purposes, we’re going to print the length of the created mask. You should get this output in the terminal:

This means we receive a flattened mask of size 256x256 (same as the original image after resizing). The mask is filled with unsigned 1-byte integers(0–255 value range), where 0 means background and 255 means person, with other values being probability between those two classes. All of this also depends on the model, but we recommend to build models that return output in this format. In a moment you will see, that this way it doesn’t require any further post-processing.
Visualizing segmentation masks with Skia
Currently, we have no way of saying if our model returns sensible outputs and we need to change that ;)
Start by creating a Skia Image:
// src/SelfieSegmentationFrameProcessor.ts

// ...
const data = Skia.Data.fromBytes(mask);

const maskImage = Skia.Image.MakeImage(
  {
    width: 256,
    height: 256,
    alphaType: AlphaType.Opaque,
    colorType: ColorType.Gray_8,
  },
  data,
  256
);
// ...
We’ve transformed model output into something that can be drawn on the screen using @shopify/react-native-skia the library. Notice ColorType.Gray8 — we’re setting the image type to grayscale so we can easily visualize it, but later on, we’ll change it to ColorType.Alpha_8 to obtain an opacity mask. Let’s draw our mask:
// src/SelfieSegmentationFrameProcessor.ts

// ...
const srcRect: SkRect = { x: 0, y: 0, width: 256, height: 256 };

const dstRect: SkRect = {
  x: 0,
  y: 0,
  width: frame.width,
  height: frame.height,
};

const emptyPaint = Skia.Paint();

frame.drawImageRect(maskImage, srcRect, dstRect, emptyPaint);
// ...
All we do here is to set two rectangles: one on the source 256x256 mask image (so we’re going to the entire image, without cropping) and one on the destination surface. When rectangles are of different sizes, the image will automatically be resized. We also need to set the paint parameter, but for now, the paint will remain empty. Note, we don’t call frame.render(), we don’t need to draw a frame. The results are the following:

We’ve verified that the model returns correct output, so now it’s time for final product — background blur. We’ll achieve it in two steps:
- Blur entire frame.
- Draw masked part without blur on top of it.
Image blur
We start with the first part, which is straightforward (you can temporarily comment out other code inside the frame processor):
// src/SelfieSegmentationFrameProcessor.ts
// ...
const frameProcessor = useSkiaFrameProcessor((frame) => {
'worklet';
const paintBlur = Skia.Paint();
const filterBlur = Skia.ImageFilter.MakeBlur(50, 50, TileMode.Clamp, null);
paintBlur.setImageFilter(filterBlur);
frame.render(paintBlur);
}, []);
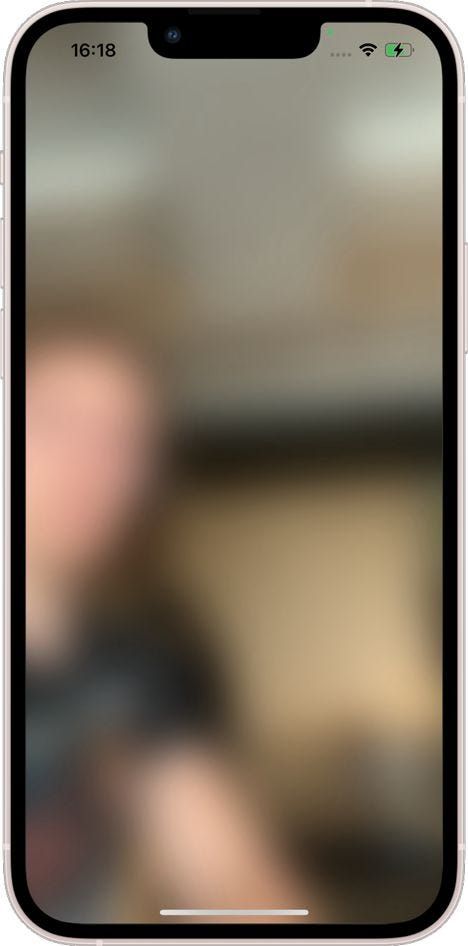
// ...This code will blur the image using a Gaussian filter. You can play around with sigma values, but we found that 50 works pretty well:
Blending two images
Now we want to draw a clear human portrait over a blurry background. For that, we’ll need image blending. We’ll start with drawing our mask over blurred images:
// ...
const maskImage = Skia.Image.MakeImage(
{
  // ...
  colorType: ColorType.Alpha_8,
}
// ..
);

// ..

const maskPaint = Skia.Paint();
maskPaint.setBlendMode(BlendMode.SrcOver);

frame.drawImageRect(maskImage, srcRect, dstRect, maskPaint);
We’re changing the image type to Alpha_8so it can be properly blended, and we use BlendMode.SrcOver — you can read more about blend modes here: https://skia.org/docs/user/api/skblendmode_overview/ The result is the following:
Now the goal is to draw the original frame inside the segmentation mask and then draw the result on top of the blurred image. We can accomplish it with the code below:
// ...
const paintSrcIn = Skia.Paint();
paintSrcIn.setBlendMode(BlendMode.SrcIn);

const paintEmpty = Skia.Paint();

const auxiliarySkiaSurface = Skia.Surface.MakeOffscreen(
  frame.width,
  frame.height
);

const auxiliaryCanvas = auxiliarySkiaSurface?.getCanvas();

auxiliaryCanvas?.drawImageRect(maskImage, srcRect, dstRect, paintEmpty);
auxiliaryCanvas?.drawImage(frame.__skImage, 0, 0, paintSrcIn);
const snapshot = auxiliarySkiaSurface?.makeImageSnapshot();

if (snapshot) {
  frame.drawImage(snapshot, 0, 0);
}
auxiliarySkiaSurface?.dispose();
// ...
You can see a few additional elements here. We need an auxiliary drawing surface, separate from the drawable framewe used before. First, we draw our alpha mask, and later we draw an original image (stored in frame.__skiImage) with BlendMode.SrcIn. It causes the image to only fill pixels that are overlapping with positive values from the mask. Last but not least, we take a snapshot of the secondary surface and draw it on the main frame. We’ve achieved our final goal:
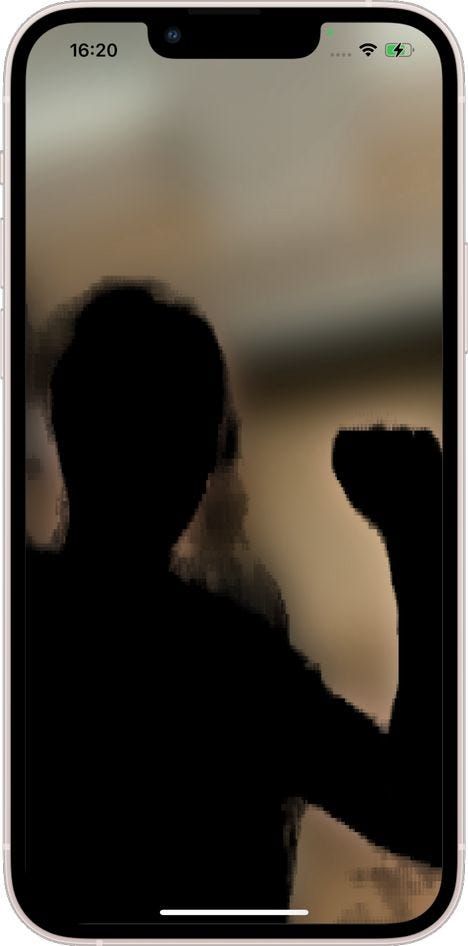
Final touches
As you can see, the boundary between foreground and blurred background is rough and pixelated. We can also see that the mask is a little too big. We erode and then smoothen it by applying Skia filters on the mask:
// ...
const paintMask = Skia.Paint();
let filter = Skia.ImageFilter.MakeErode(7, 7, null);
filter = Skia.ImageFilter.MakeBlur(5, 5, TileMode.Clamp, filter);
paintMask.setImageFilter(filter);
// ...
auxiliaryCanvas?.drawImageRect(maskImage, srcRect, dstRect, paintMask);
//...
We encourage you to take a look at the full code from our repo and experiment with it. Another model you can try out is the object detection model efficientdet which can be found here.
About us
We’re Software Mansion: software development consultants, AI explorers, multimedia experts, React Native core contributors, and community builders. Hire us: [email protected].